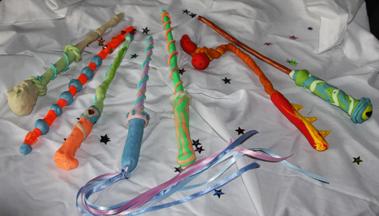
Children's Art - Magic Wizard Wands

Please note that your wand is not a toy, and should not be used to poke your little sister, or anyone else for that matter. Your wand should not be left within reach of the family dog or any young children who might want to chew on it.
What you will need:
- Polymer clay, such as Sculpey, in assorted colors.
- Translucent Liquid Sculpey to fix a broken wand.
- 12" precut dowel (sold in packages or 10 or 12) or stems of floral wire.
- Faceted Glass Beads
- Tacky glue or other thick glue
- Ribbon, if desired
- Glossy Glaze varnish, if desired
- A craft and clay oven (you can use an old toaster oven as long as you don.t use it to cook food again after you.ve baked polymer clay in it).
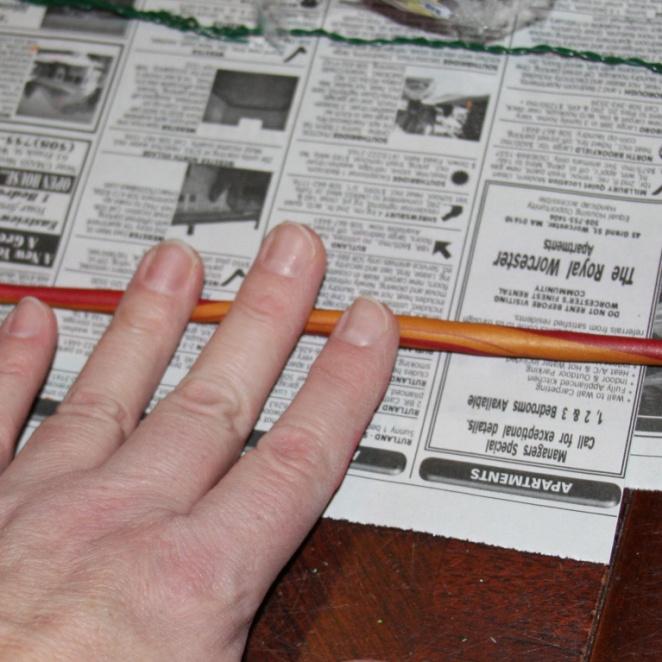
- Newspaper to protect your working surface
- An adult if you are need help to use an oven or to cut wire or a dowel
Caution!
Sculpey is labeled non-toxic, but it can release unhealthy fumes if it's not baked according to its instructions. Never bake polymer clay at a temperature higher than specified (we usually bake the clay at 5 to 10 degrees lower than the temperature that the label gives, just in case our oven's temperature fluctuates hotter). Make sure the room is well ventilated, and try not to inhale the fumes. Whenever possible, we move our craft oven outside on the steps to bake clay.
Basic Directions:
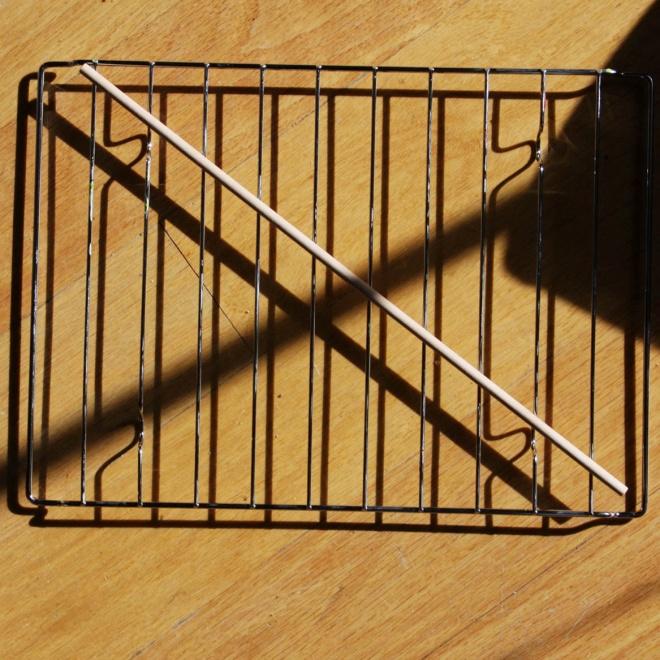
Lay your dowel diagonally across the oven.s wire shelf to make sure you'll be able to close the door with an inch or so to spare. If your oven is small, you may need to ask an adult to cut down the dowel. If you are using floral wire, you can simply bend and fold the extra length back.
Knead the clay until it is soft and smooth throughout. This can take a while, which is why some people invest in a clay or pasta machine if they use clay often.
Cover the dowel with a thin layer of clay. To smooth the clay surface, roll the wand back and forth over your working surface.
Bake the wand for about 10 minutes. By hardening the first layer of clay, the next layers will be easier to apply. Let the wand cool inside the oven for 10 or 15 minutes before handling.
Add a handle and clay shapes. If you want to decorate your wand with beads, use the actual beads to indent the clay where you will want to place them. Some glass beads contain harmful chemicals that could be released by heat, so you can glue them into place after baking.
Bake the wand again for 10 or 15 minutes. After the wand has cooled, make sure the clay has hardened: if any part is still soft, you may need to bake it for another 5 or 10 minutes.
Glue the beads into their indented holes.
If your wand breaks, you can fix it!
For a simple crack, smooth some Liquid Sculpey into the crack and re-bake according to the directions. If has been knocked off of the dowel or floral wire, smooth on some Liquid Sculpey, refill the area with the same color clay, and re-bake. If the dowel has broken, glue the ends back together, hold together with tape while the glue dries, then rebuild and re-bake the wand.
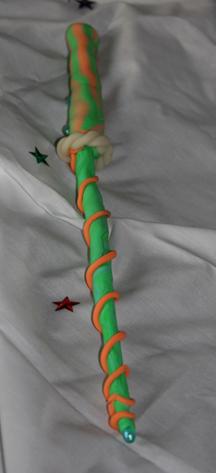
VariationsDragon Eye Wand
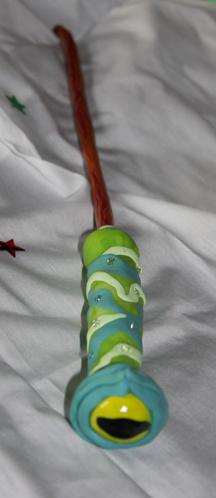
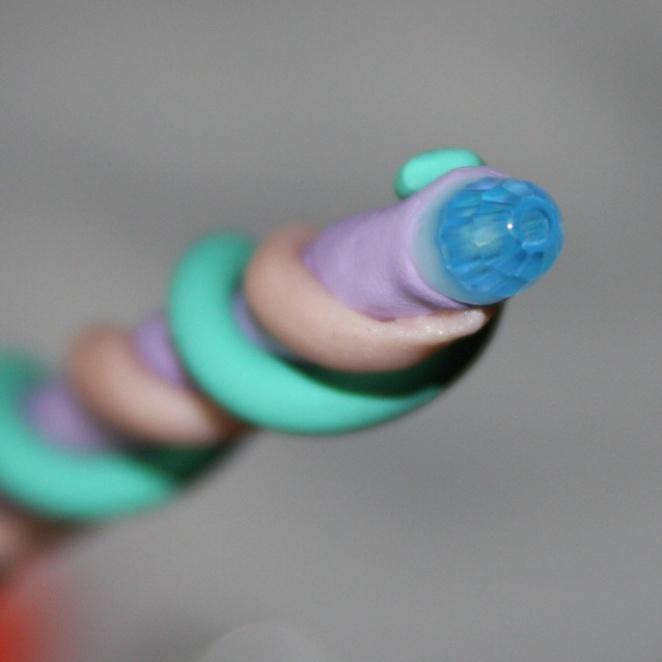
We used a double twist of floral wire to make this wand because we wanted the tip to be very slender. Sadly, the wand didn't end up being as sturdy as we'd hoped and cracked after a few vigorous spells. For that reason we've given directions for making this wand with a dowel instead.
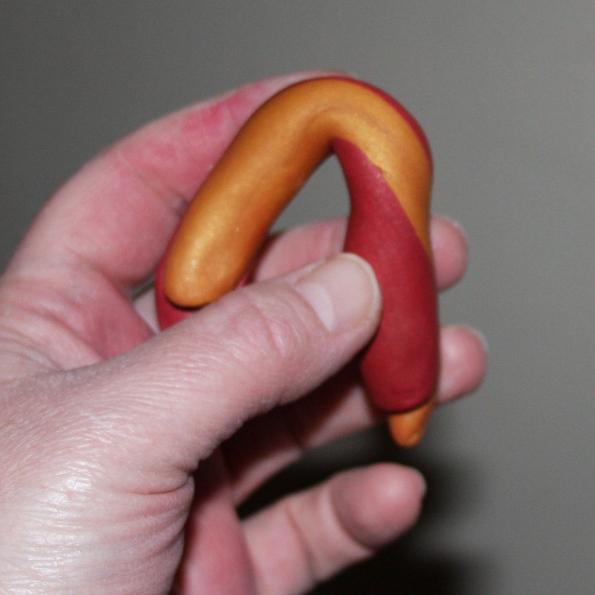
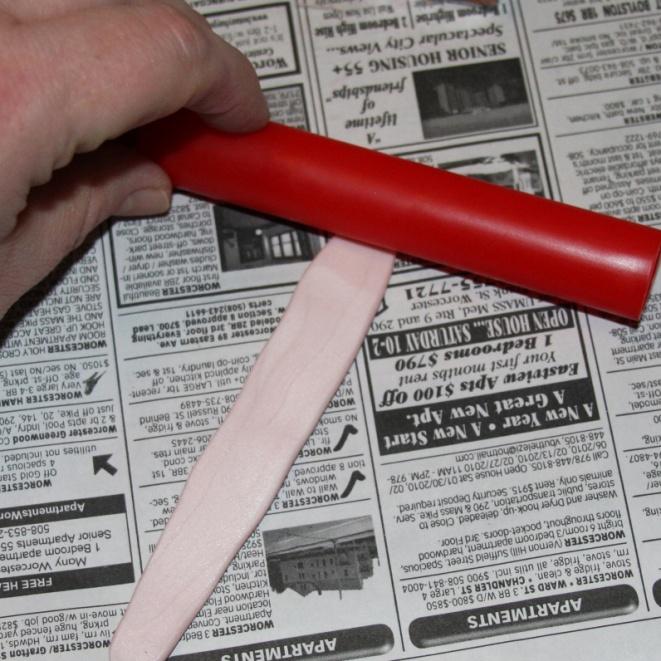
To make a wand look as if it is made from wood, roll a log of reddish brown clay together with a log of light brown clay. Fold and roll the logs together a few times to make lines of color.
After rolling the clay into a thin snake twice as long as the dowel, place the dowel on top. Fold the log up and over the top of the wand.
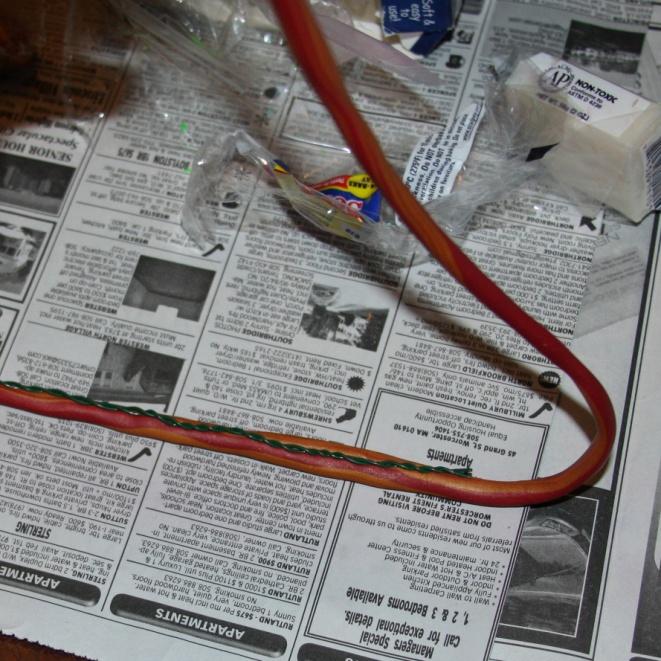
Gently pinch the two seams together along the length of the dowel. Roll the clay covered dowel back and forth over your working surface to smooth the clay while keeping the "wood grain" intact.

To make a dragon's eye, roll green clay into a ball and flatten a tiny log of black clay into it in the shape of an oval.
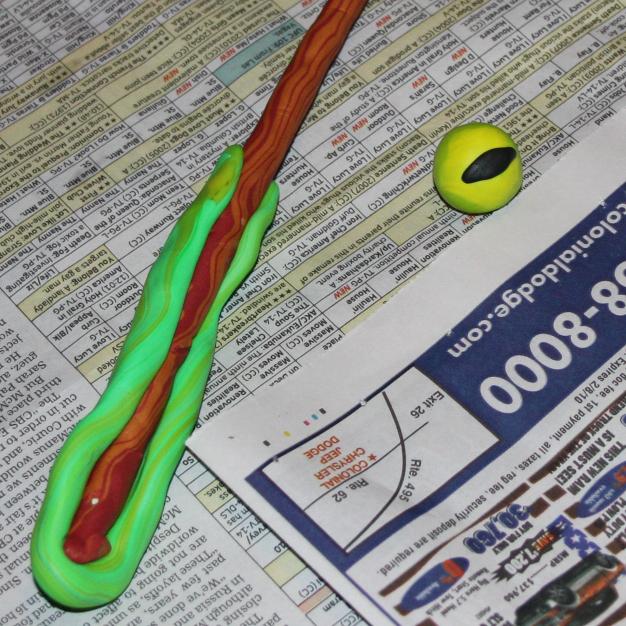
After the wand's final baking, paint Glossy Glaze varnish over the dragon's eye to make it more lifelike. You can paint gloss over the .wood grain. as well to make it looked polished.
Ribbon Wand:
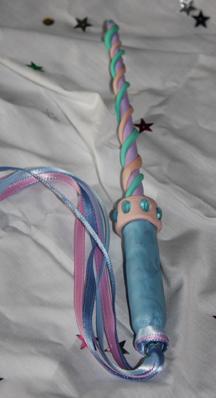
With the help of a crystal bead glued to its tip, this wand gives the illusion of sparkling with magic. After covering your dowel with purple clay, use your bead to indent a hole at the wand.s very tip. Bake the first layer. After the wand has cooled, twist a 1/2" loop into the middle of a piece of floral wire. Wrap the ends of the wire around the handle end of the wand.
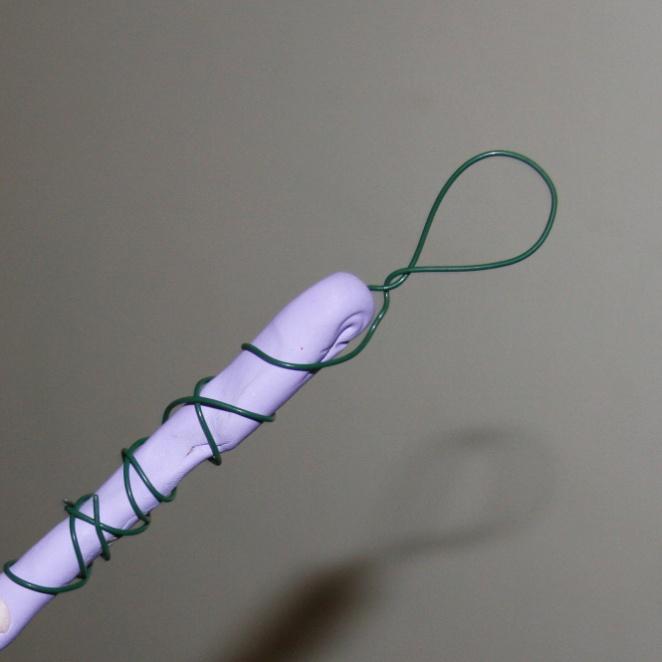
Keeping the wire loop free of clay, form the handle over the wire.s wrapped ends with blue clay.
If you have a clay or pasta machine, roll out a flat sheet of pink clay. If you don't have a clay machine, you can flatten clay with your hand or with the roller that is sometimes included with packaged clay assortments.
Cut a pink band of clay and attach it to the handle near the wand.s shaft. Position where you want the glass beads to be by indenting the pink band of clay, decorate the wand's shaft, and then bake the wand a second time.
After the wand has cooled, glue the beads into place on the pink band and tip of the wand.
Cut three 2-foot long ribbons from different colors and tie them around the wire loop at the end of the handle.
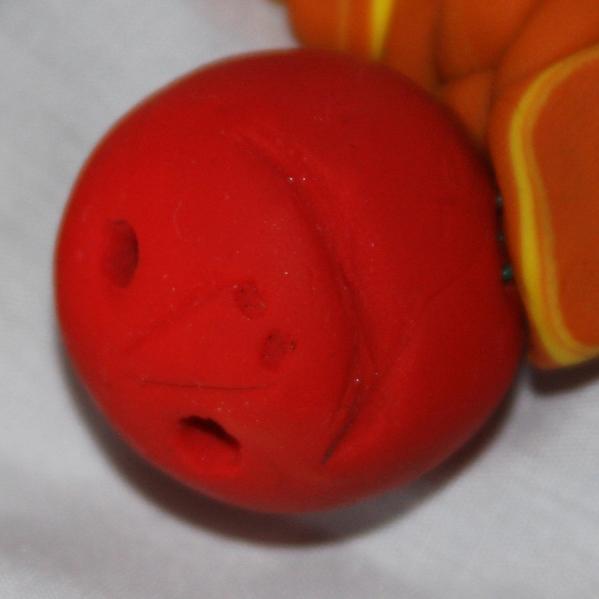
Two Headed Wand:
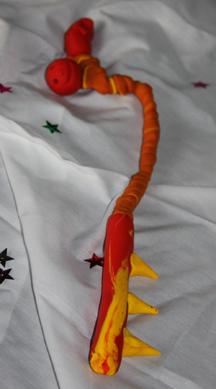
This wand is built on several pieces of floral wire that have been twisted together for strength. Cover the wires with the first layer of clay, bake for 10 minutes, and then cool. The heads were shaped separately and then stuck onto the tips before the final firing.
Glow in the Dark Wand:
This wand was made with both glow in the dark clay (Sculpey sells a wonderful assortment of different colored glow in the dark clay) and regular polymer clay. The regular clay looks black in the dark against the glow in the dark clay, which is an interesting effect.
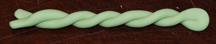
Roll long thin snakes of clay to wrap around the wand. For the white glow in the dark twist around the top of the handle, roll a long thing snake of clay, bend it back in half, and twist the two ends around each other. Pinch the ends together in the back.
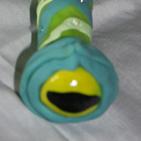
Skeleton Finger Wand:
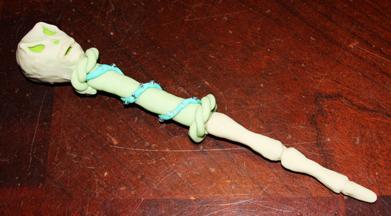
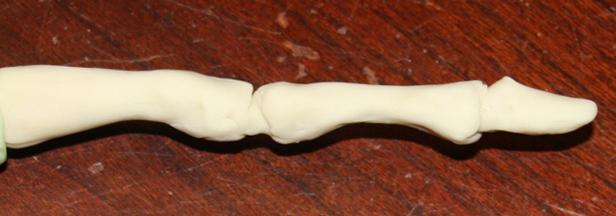
This wand is made entirely of glow-in-the-dark clay. Cover your dowel with a layer of whitish glow in the dark clay and form the skeleton finger at one end. You can look at your own finger to figure out how the bones would be shaped, or you can ask an adult to help you find a picture on the internet.
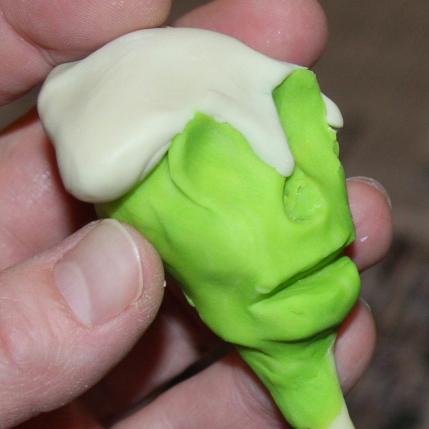
Bake the wand for 10 minutes and cool. Make an egg shape out of green glow-in-the-dark clay and add it to the handle end. Gently press into the clay where you will be positioning the eyes, nose, and mouth of the skull. Bake the wand a second time.
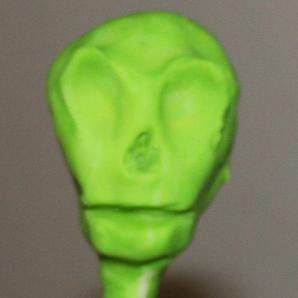
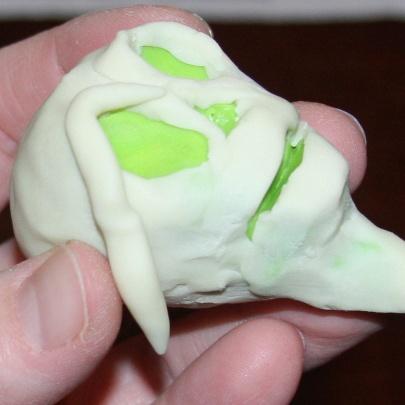
When the wand is cool and firm, you will be able to smooth a thin layer of yellow-white glow-in-the-dark clay over the green egg shape.
Form the "eyebrows" and forehead with snakes of clay.
Wrap clay around the handle between the skull and top of the finger bone. Smooth the clay. Decorate the handle and bake a third time.
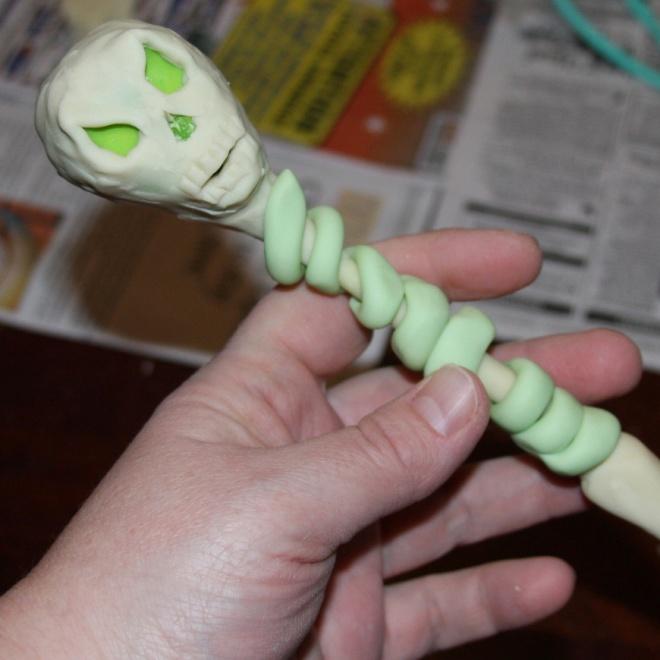
At night, let the wand sit under a lamp for a few minutes before turning out the lights. The eyes and the nose will glow in a different color than the outside skull.