Button Friendship Bracelets

Most friendship bracelets attach by pushing a tasseled knot through a segment of unbraided floss. Our version attaches with a button sliding through a special opening. Follow our directions for making an easy braided friendship bracelet. Or make your own braiding disk out of cardboard and try out some new designs based on Kumihimo, the Japanese art of braiding cord!
What You Will Need:
Embroidery floss in your choice of colors. You will need at least 2 skeins of different colored floss to make a single bracelet. We recommend DMC Brand floss because it braids smoothly and has a nice selection of colors.
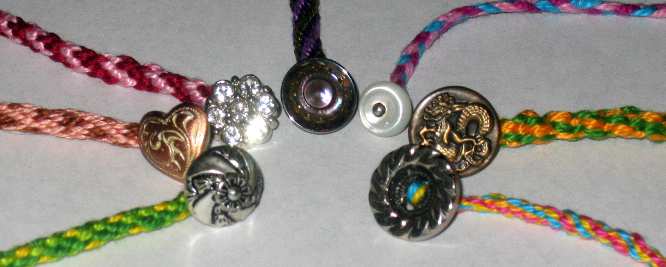
Buttons. Some buttons have a loop (called a "shank") on the back for the thread to go through. Other buttons have holes that go from the front of the button through to the back. Whichever kind of button you choose, the holes will need to be large enough for the combined pieces of embroidery floss to thread through.
Scissors
Pencil
Clipboard if making an easy braided bracelet
Cardboard if making a braiding disk. Here's a Braiding Disk Tutorial PDF
Foam disk, such as if you want a more permanent disk, or a gift for someone who enjoys making friendship bracelets.
Easy Braided Bracelet

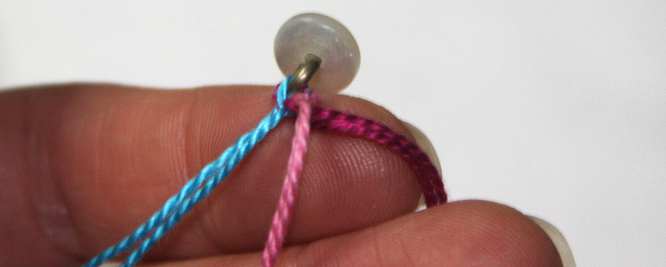
You will need embroidery floss, scissors, a button, and a clipboard. For our easy braided bracelet, we chose an antique boot button with a shank.

We used three different colors of embroidery floss so it would be easier to show how to braid. Cut three sections of embroider floss that are each 4 feet long. As you make more of these bracelets, you may decide to start with shorter sections if your wrist is smaller.
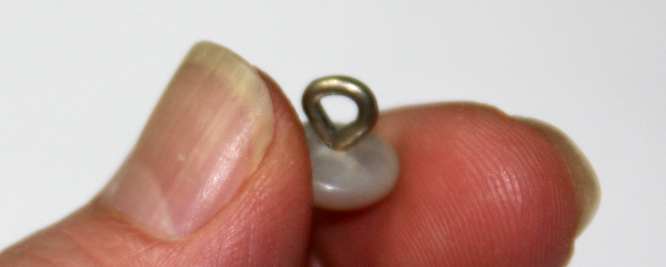
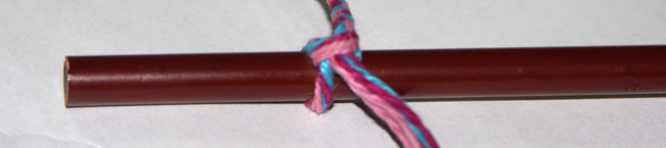
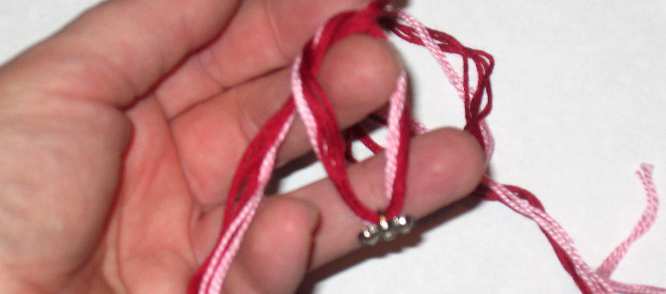
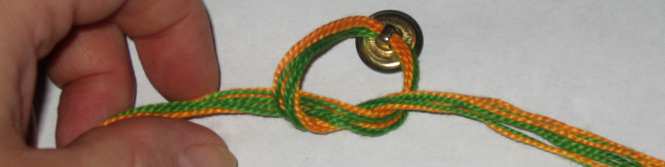
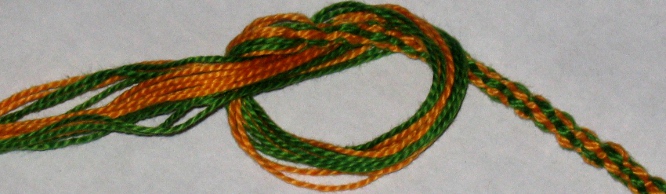
Holding the three sections together, thread their ends through the shank. Move the button to the middle of the floss and tie into place with a knot.

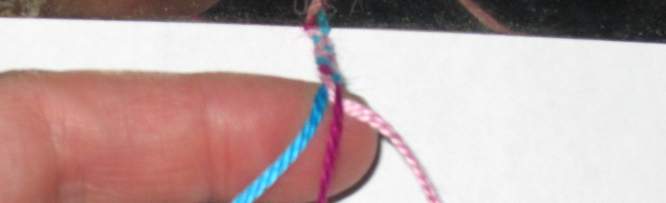
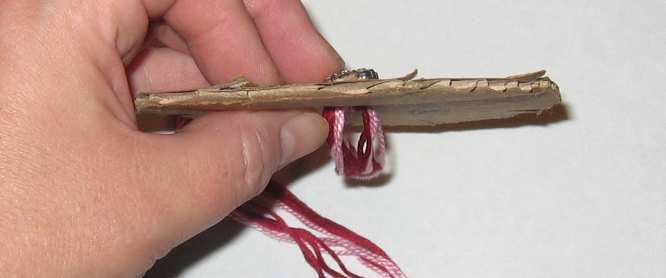
Join the strands of same colored floss so that you have three sections of double floss. Clip the button under the clipboard spring so that the floss hangs down.

To braid, take the strand on the left side (the blue floss) and cross it over the middle strand (the red floss).
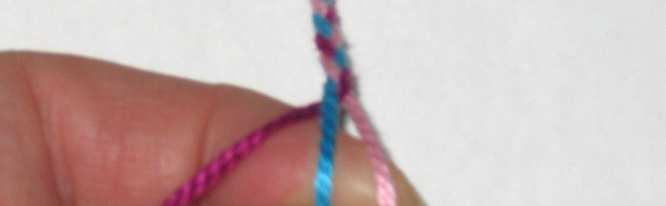

Next, take the strand on the right side (the pink floss) and cross it over the middle strand (the blue floss)
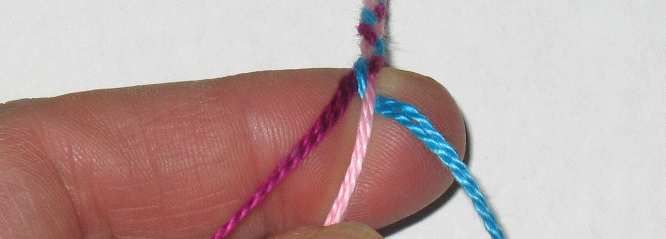

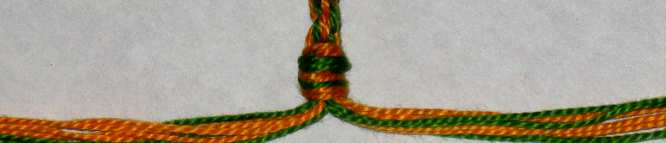
Take the strand on the left side (the red floss) and cross it over the middle strand (the pink floss). Continue crossing the right strand over the middle strand, then the left strand over the middle strand, back and forth, until the braid is almost long enough to reach around your wrist.

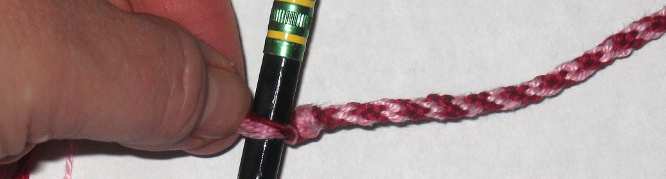
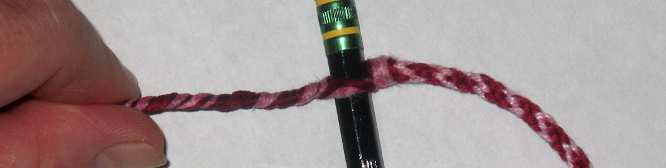
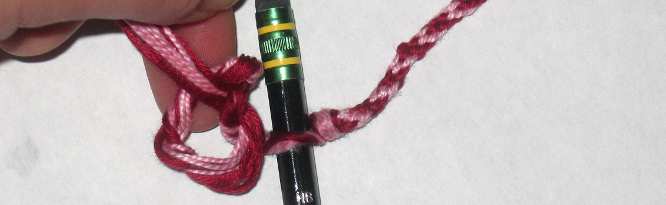
To make a loop for the button, wrap the unbraided floss around a pencil and tie a knot. Trim the ends of the unbraided floss to make a tassel.


Once you've learned how to make an easy braided bracelet, try a braiding disk!
Disk Braided Bracelets

"Kumihimo" is the Japanese art of braiding cord. You can make simple braids based on this craft by making your own braiding disc out of a piece of cardboard. You can click here for templates for both 8 slot and 16 slot braiding discs or purchase . The braids you make with the 8 slot and the 16 slot disks are almost the same thickness; however, with the 16 slot disk you have more options for making your own designs.
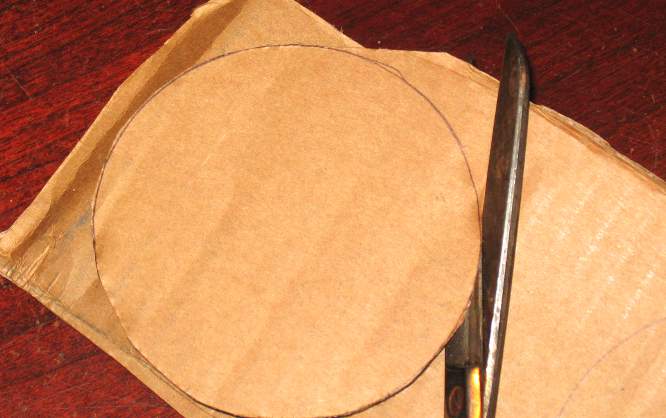

To make a braiding disk, cut a circle out of cardboard.
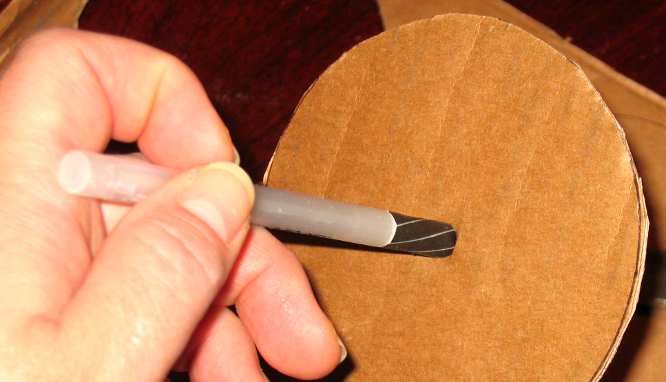

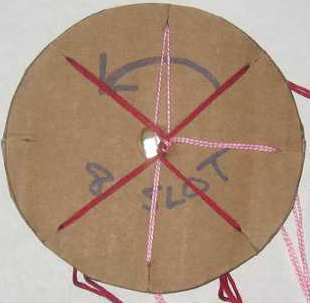
Poke a pen through the cardboard to make a hole in the center. Then use scissors to cut either 8 or 16 slots along the edges of the circle, as shown on our braiding disk template.
Braiding with the 8 Slot Disk
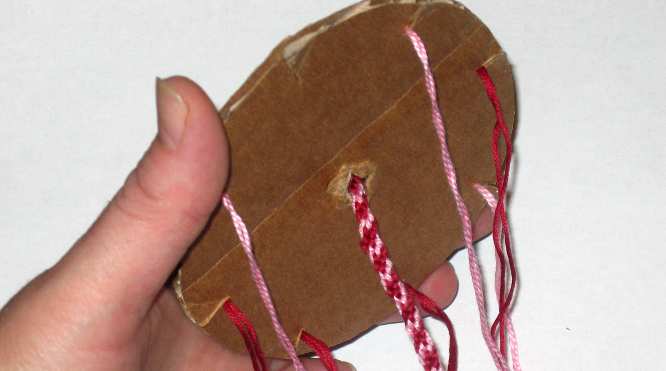
For this bracelet, you will need embroidery floss, scissors, a pencil, an 8 slot braiding disk, and a button (we used a vintage rhinestone button). For a this particular bracelet, it is less confusing for a beginner to use a cardboard braiding disk instead of a 32 slot Kumihimo disk.
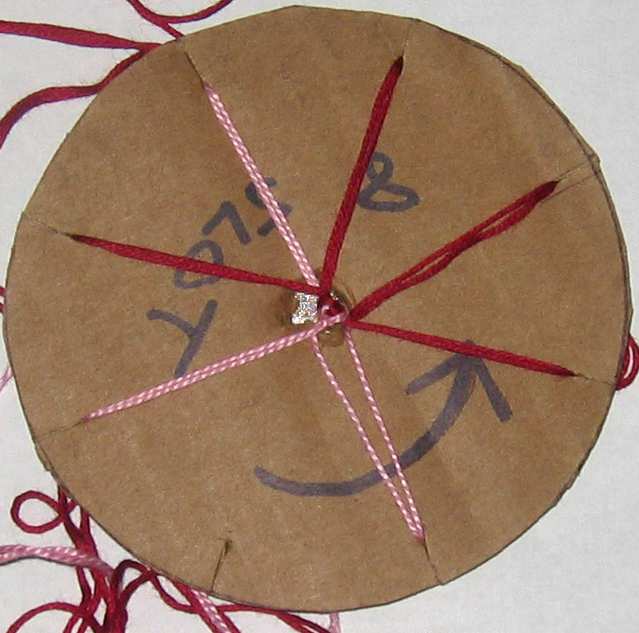
Cut 7 lengths of 4 foot long embroidery floss. We used three pink and four red for our design.

Bunch the pieces of floss together and thread through the button at the same time. Tie a knot to keep the button at the midpoint.

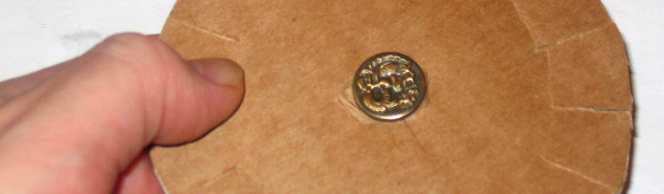
Push the button through the center of the braiding disk.
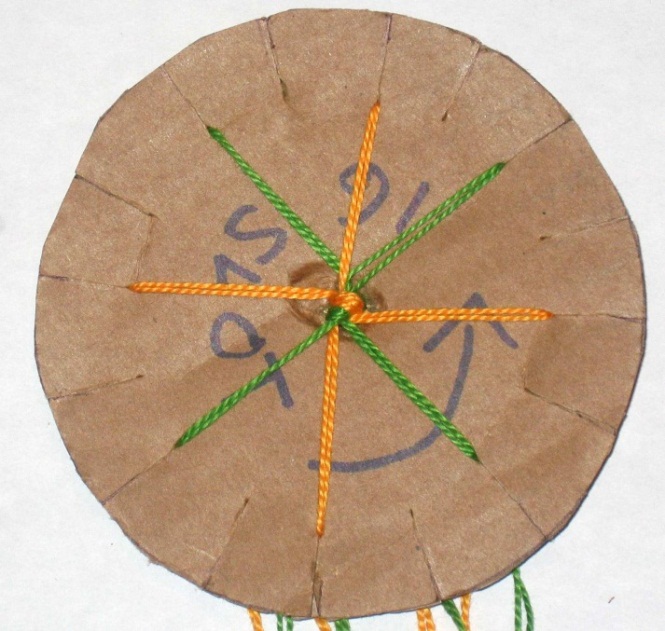
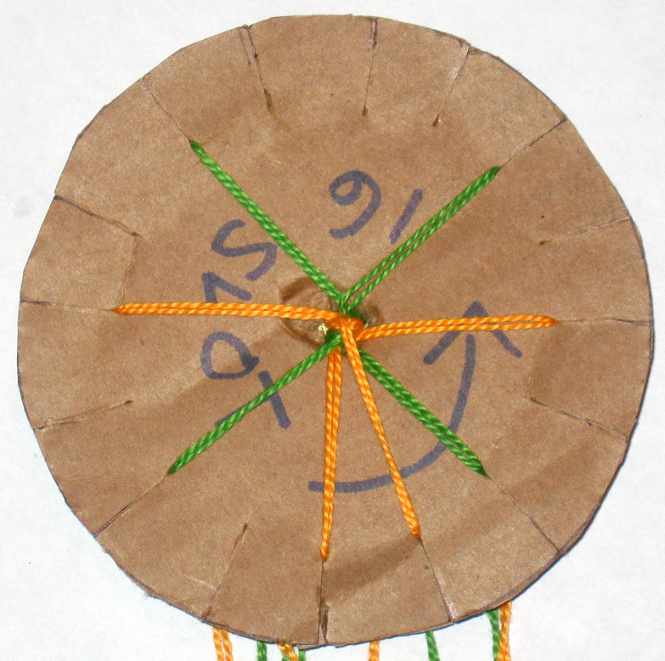
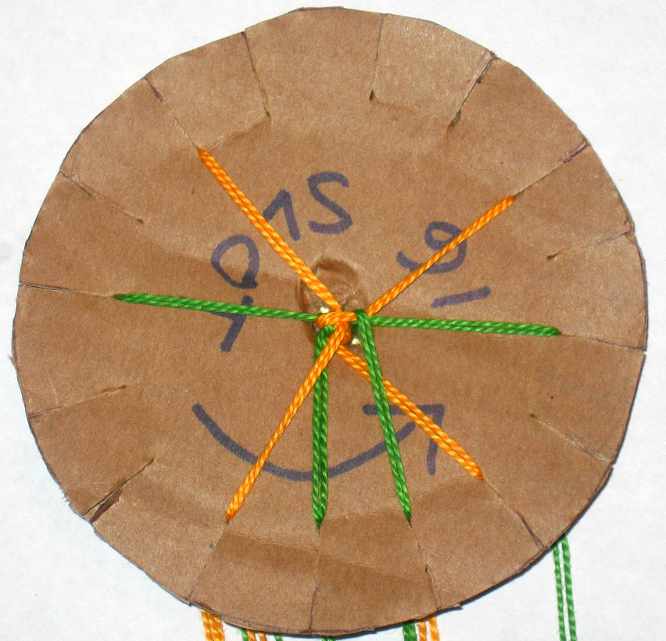
Now you will have 14 ends coming through the center hole, with the button on the other side of the disk. Group two ends together in each slot. Now seven of the slots will be filled, and one slot will be empty.

The empty slot is on the left hand side of the above picture. Count three slots to the right of the empty slot and lift the red floss out of its slot.
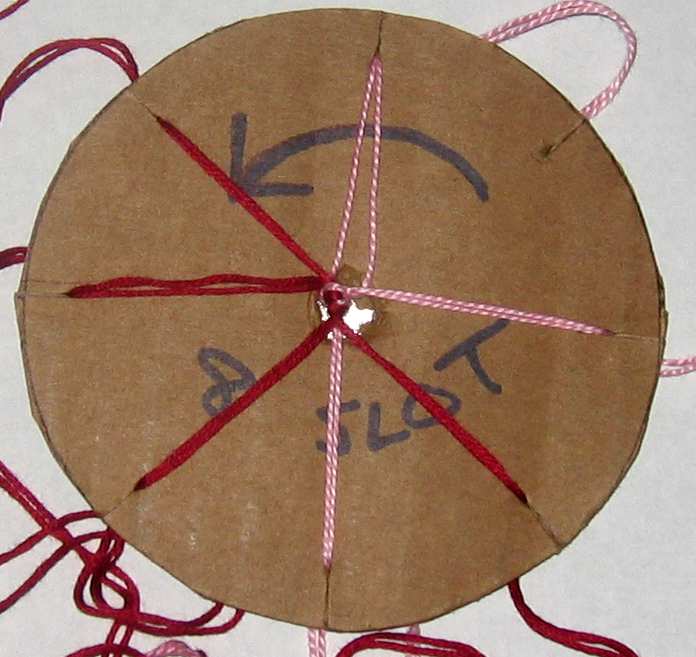

Move the red floss to the left to fit into the empty slot. You just crossed over two filled slots. While braiding, always move the floss in the left direction (counter-clockwise).
After you move the floss to a new slot, draw the length of the floss between your fingers to untangle the ends.

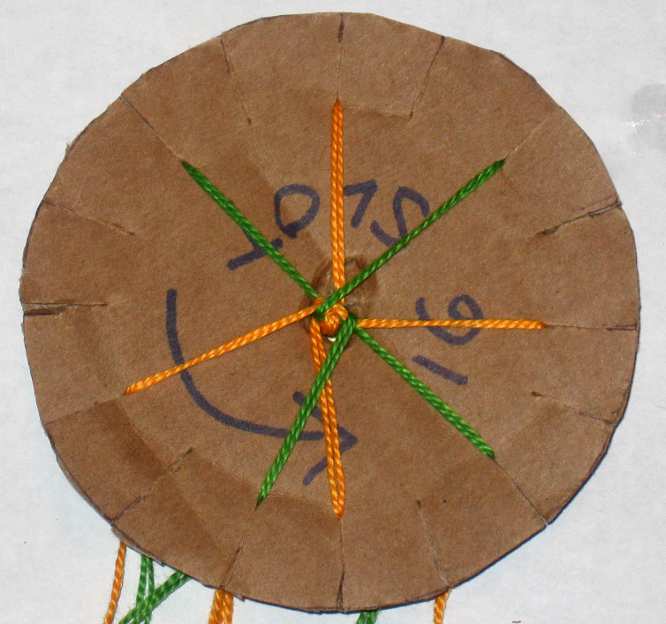
Find the new empty slot. Count three slots to the right. Lift the pink floss out of its slot.
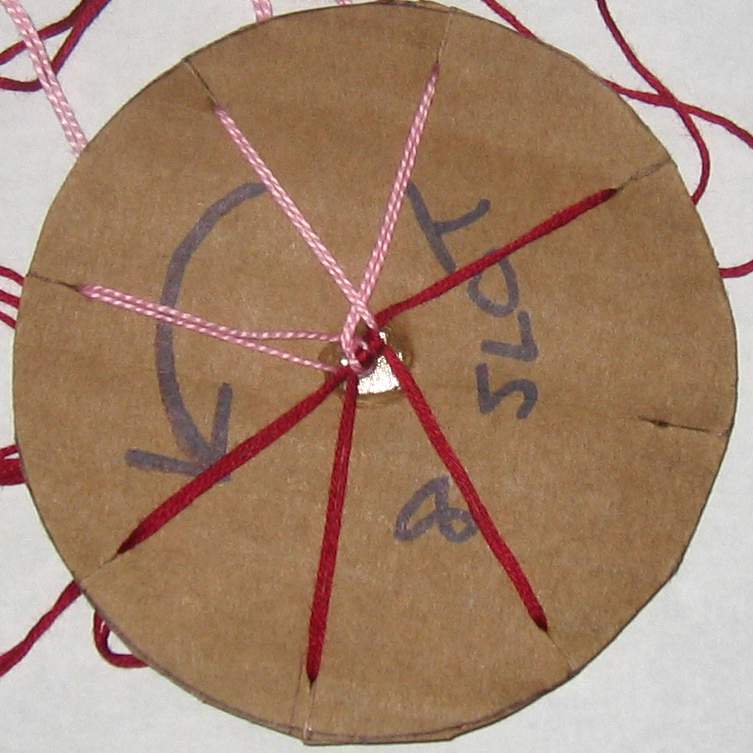

Move the pink floss to the left to fit into the empty slot. You just crossed over two filled slots.

Find the new empty slot. Count three slots to the right. Lift the red floss out of its slot. Move it to the left to fit into the empty slot.
Rotate the disk as you continue to braid. Always count to the third slot to the right of the empty slot. Always move that floss over the other two slots and into the empty slot.
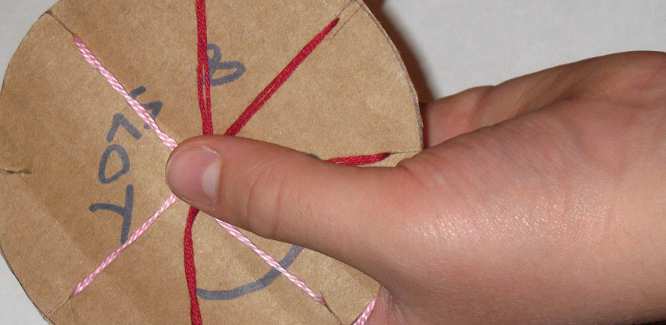

As you braid, it helps to keep your thumb over the center hole. This will keep the braid moving smoothly through to the other side of the disk.

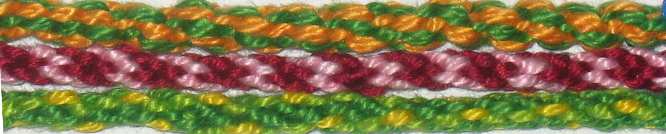
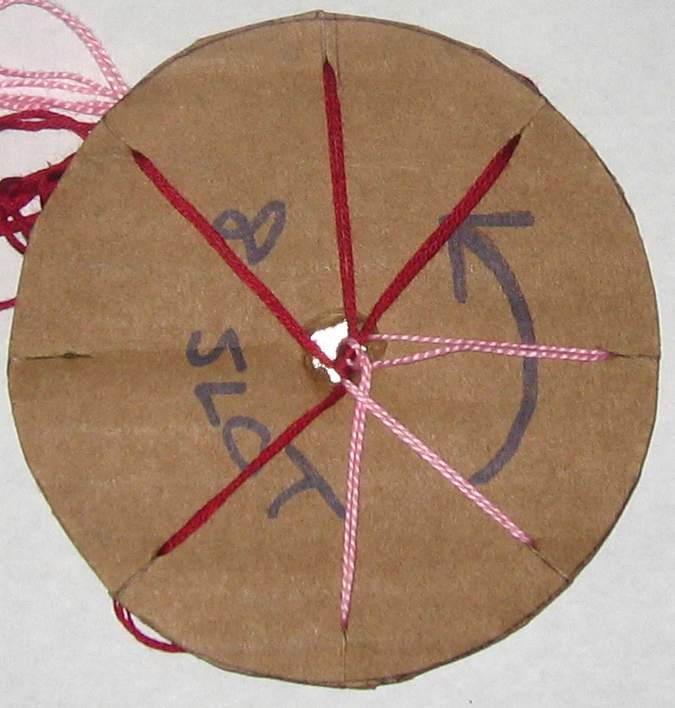
The braid on the other side of the disk will grow longer and longer as you braid. If you place the floss in your disk the same way we did, you will get this same pattern. To make new designs, you can change the number of colors (you can use up to seven colors!) and the way they are arranged in the disk's slots.
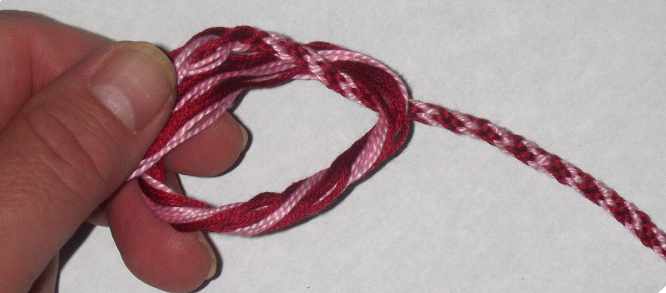

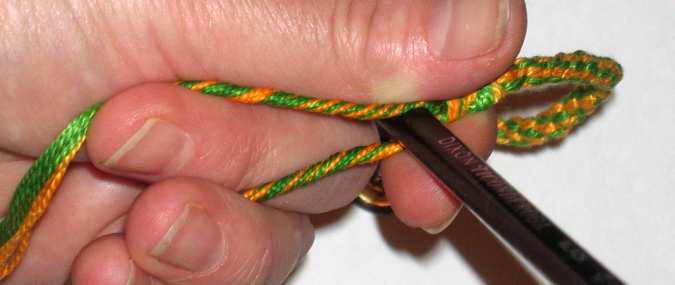
Now and then check the length of your braid against the size of your wrist. When it is about half an inch short of reaching around your wrist, make a knot at the end.


Divide the ends evenly, seven ends on one side, seven on the other.

Moisten each group of ends in water, then twist each group tightly.

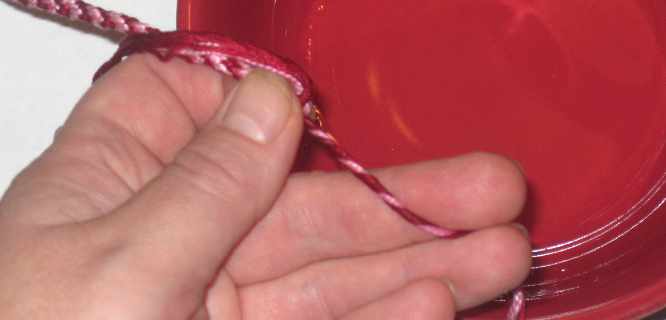
Hold the two twisted ends in one hand.

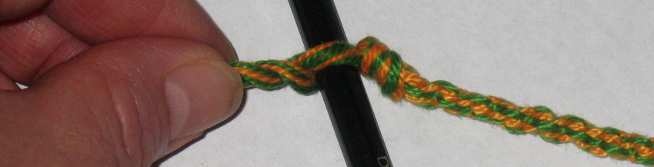
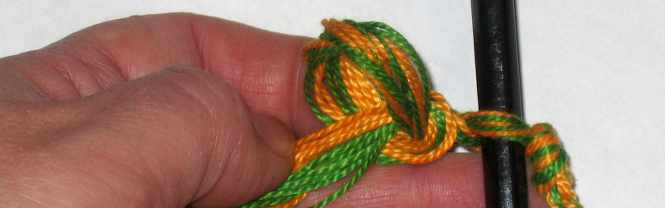
Wrap the twisted ends around a pencil.

Twist the ends together.

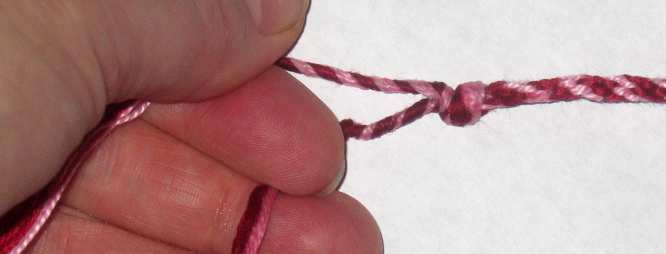
Tie a knot close against the pencil.


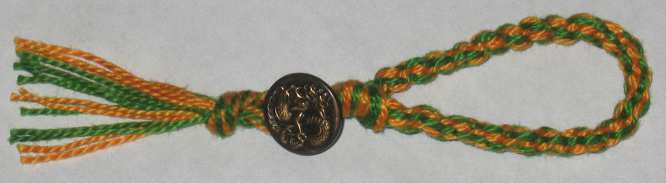
After you've formed the hole for the button to pass through, trim off the extra floss to make a tassel.
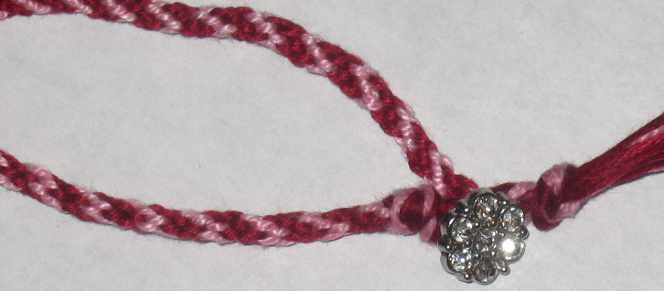

Here's the finished, one of a kind, bracelet!
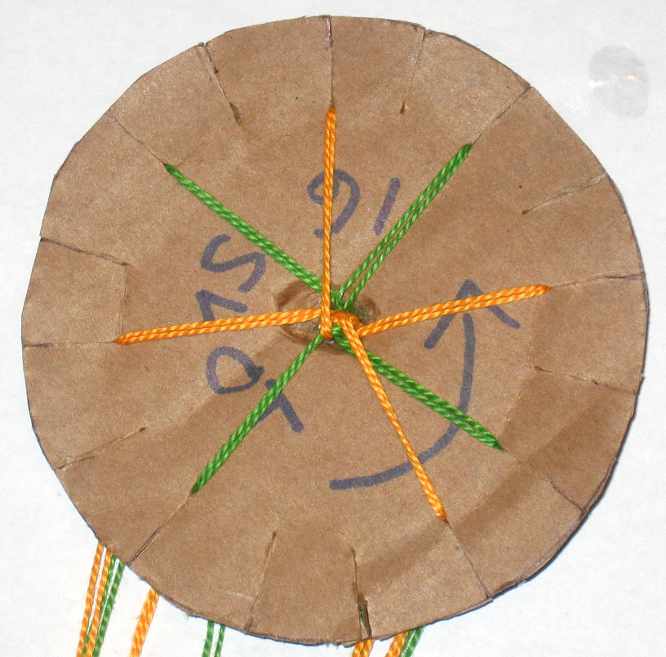
Braiding with the 16 Slot Disk
On the 16 slot disk, the embroidery floss is moved in a different pattern than it is for the 8 slot disk, but once you get the repetition down, it is just as easy! The braiding sequence for the 16 slot is the same as for a 32 slot, but with fewer strands
For this bracelet, you will need embroidery floss, scissors, a button, a pencil, and a braiding disk (either a cardboard disk or a ) .

Cut 8 lengths of 4 foot long embroidery floss. Join the pieces of floss together and thread through the button. Tie a knot to keep the button at the midpoint .

Push the button through the center of the braiding disk. We're using a vintage button with an embossed Asian dragon.
As you braid, it helps to keep your thumb over the center hole. This will keep the braid moving smoothly through to the other side of the disk.
Always move the floss in the left direction (counter-clockwise).
After you move the floss to a new slot, draw the length of the floss between your fingers to untangle the ends.

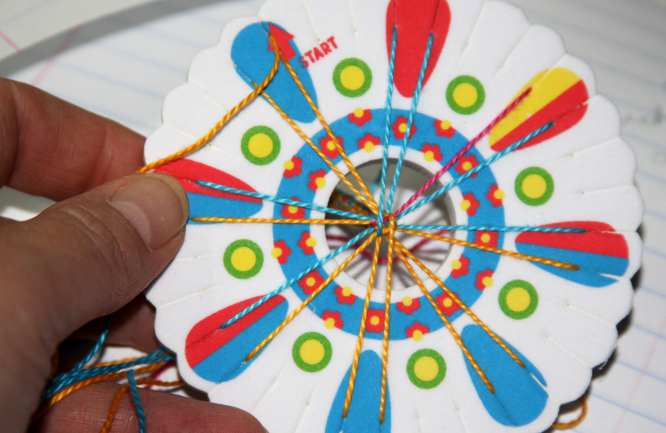
Grouping the ends together by color, put two ends into every other slot. If you set up your disk the way we did, you will get the same pattern. You can make up new designs by using different colors in different arrangements.

Take the orange floss from the top of the disk and put it into the slot to right of the orange embroidery floss at the bottom.

Now take the orange floss to the left of the piece you just moved and pull it up into the top slot.
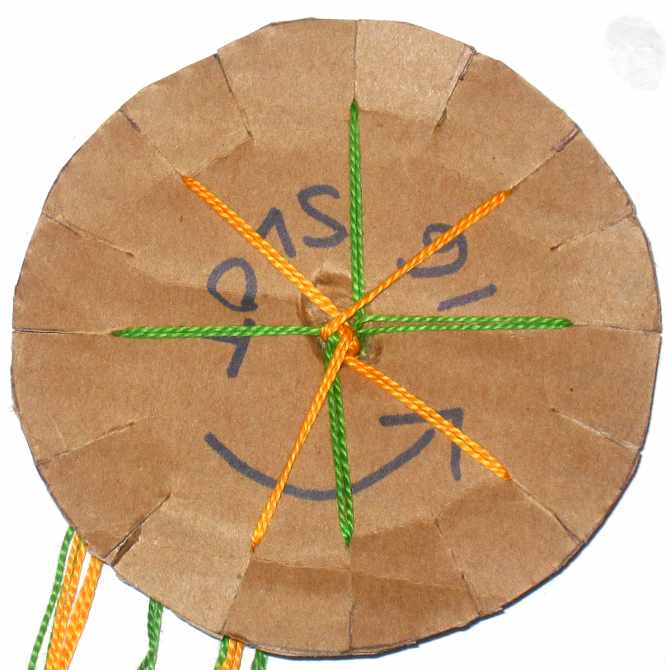

Rotate the disk two slots to the left so that you have a new slot at the top.

Take the green floss from the top of the disk and put it into the slot to the right of the green embroidery floss at the bottom.


Now take the green floss to the left of the piece you just moved and pull it up into the top slot.

Rotate the disk two slots to the left so that you have a new slot at the top.
Now you are back to orange again! As you continue braiding this pattern, you will always be crossing the top color down and the same color up.

When the braid is about half an inch short of reaching around your wrist, make a knot at the end.

Divide the ends evenly, eight ends on one side, eight on the other.


Moisten each group of ends in water, then twist each group tightly.

Put a pencil between the two twisted groups of floss.

Twist the ends together.

Tie a knot close against the pencil. Trim the excess floss to make a tassel.

Here's another friendship bracelet ready to give to a friend!
The 32 Slot Braiding Disk
We tried out the that contains two 32 slot braiding disks made out of sturdy foam. The kit comes in a nice plastic storage box, and the directions were simple and clear. The embroidery floss supplied in the kit wasn't of the best quality... it came in vibrant colors, but it tangled and felt rough to work with. After braiding a few bracelets, we jettisoned the kit's floss, and went back to using .

The foam disks grip the floss better than cardboard, which made braiding easier. The two disks were printed each side with easy directions for laying out the colored floss, for a total of four designs.
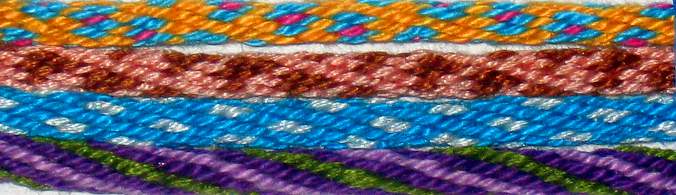

The pattern for moving the floss around the disk is the same for all four designs. The way the colors are strung on the disk are what determine which design will show up in the braid.