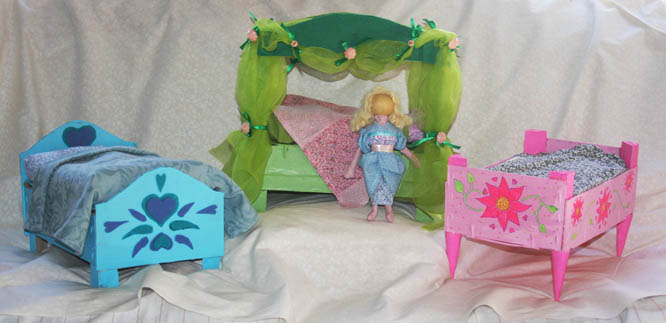
Clementine Crate Doll Bed

A sure sign of the season is the stack of wooden clementine crates that appears in the grocery every winter. Our family loves the easy-to-peel fruit, but what to do with the wood crates afterwards? They aren't recyclable, and it just feels wrong to toss them into the trash.
Making the boxes into doll beds is one way to repurpose clementine crates. Of course, you can modify these directions to any sturdy box you have around the house. The clementine crates are a good size for our homemade gourd doll, who is just under 8 inches tall. If you are making your bed for a specific doll, you can check her size against your box before you start, just to make sure the bed will fit her correctly.
For younger crafters, you may want to remove extra staples, sand down splinters, and fill in any rough areas with wood putty before beginning this project.
What you will need :
For the Basic Clementine Box Bed
An empty clementine crate or other box.
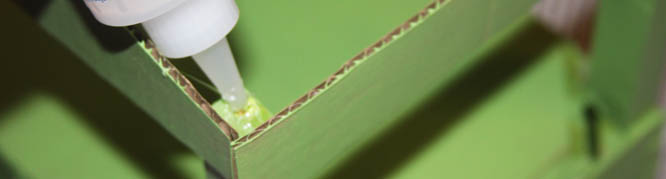
, or use hot glue if you are in a hurry
. We always keep an assortment around. You will need almost a full 2 ounce bottle for each of these beds...the wood and cardboard are thirsty!
Craft brush or
or wood scraps
in a variety of colors, if desired
For the Doll Bed with Headboard you will also need"
Cardboard
strong enough to cut cardboard
, if desired
For the Canopy Bed you will also need
, if desired.
, if desired
Light fabrics, such as ,or , if desired for the canopy bed. We used almost a full yard remnant we purchased in the clearance section of our local fabric store.
Needle and thread, or if desired for the canopy bed. Follow the directions on the label!
Doll Mattress Materials
For a no-sew mattress you will need a bath towel and a pillowcase.
For a doll mattress with a gusset, you will need 1/3 yard of fabric, a ruler, a few handfuls of , threaded needle, six to eight small buttons, and a .
Blanket Materials
You can use scarves, napkins or dishtowels as ready-made doll blankets
To make your own blankets choose fabrics that won't fray, such as or
If you want to use flannel or cotton fabric, you can treat the edges with a no-fray glue.
Super Easy Doll Bed
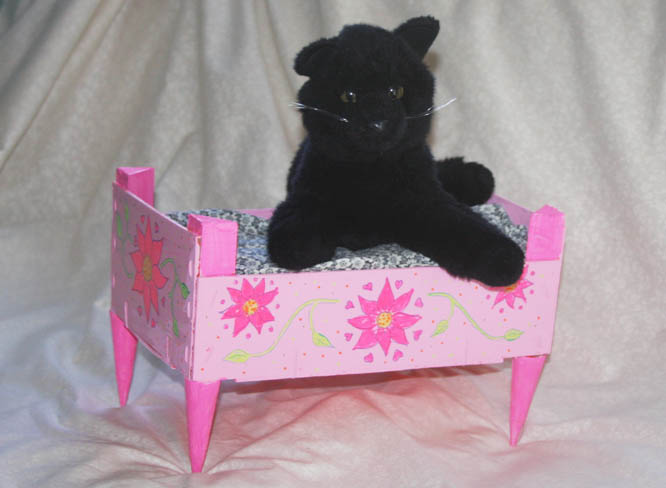

A child only needs to know how to glue, paint and doodle for this clementine box doll bed. This bed became the perfect pet bed for our plush cat toy.
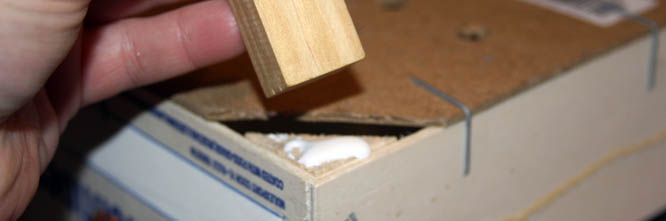

For the legs, you can use wood scraps, rectangular blocks from your block set (as we used in the photo above), or even Jenga blocks. With the clementine crate upside down, glue the blocks into the triangular holes in the bottom.
After the glue dries, paint the doll bed with acrylic craft paint and let dry. Draw flowers and designs onto the sides with colored permanent markers

For the mattress, fold a bath towel to the size of the box and then slip it into a pillowcase.

Fold the pillowcase so that the extra fabric was on the bottom and place it inside the bed.
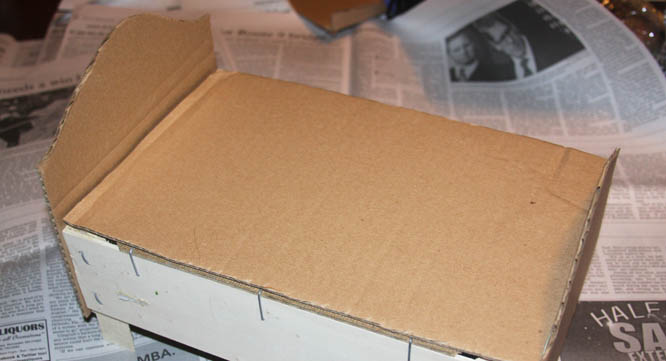
Doll Bed with Cardboard Headboard
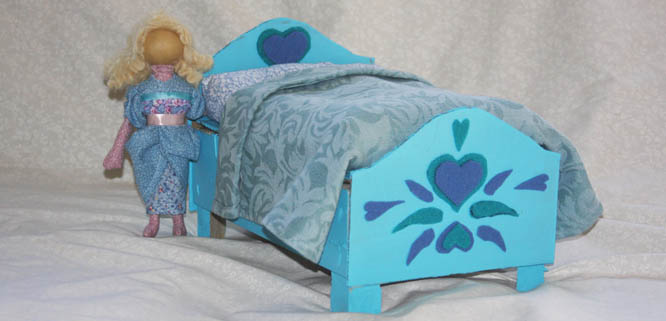

This version of a clementine crate doll bed doesn't have legs glued to the bottom of the crate. Instead, turn the box upside down so that the raised wood corners on the top become the legs.
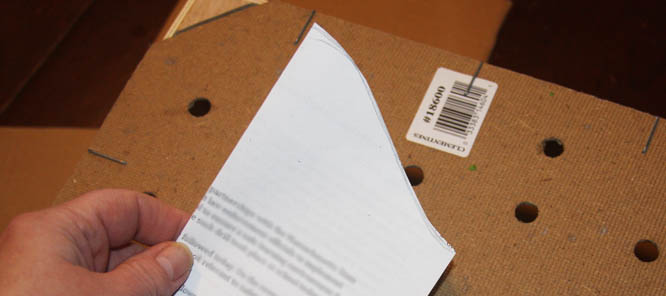

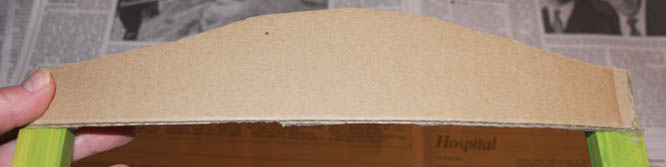
To make a template for the headboard and footboard, cut a piece of scrap paper to the same width as the short end of the crate. Fold the paper in half and cut a swoopy curved line.
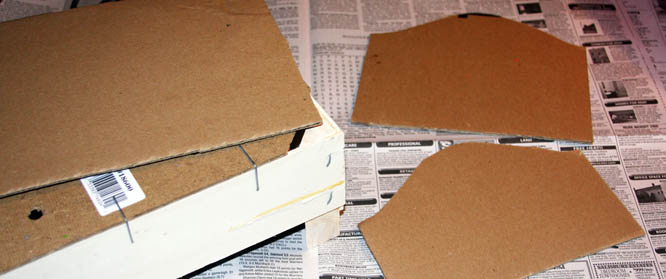

Trace the template onto cardboard from a used shipping box. Make the footboard an inch or so shorter than the headboard. Cut out the headboard and footboard. Also cut out a larger piece of cardboard the same size as the bottom of the crate.

Glue the larger piece of cardboard over the holes in the bottom of the crate. Glue on the headboard and footboard. Paint the bed with acrylic craft paint.
While the paint dries, cut out heart and droplet designs from two colors of craft felt. Glue them into position with Tacky Glue.
Canopy Doll Bed
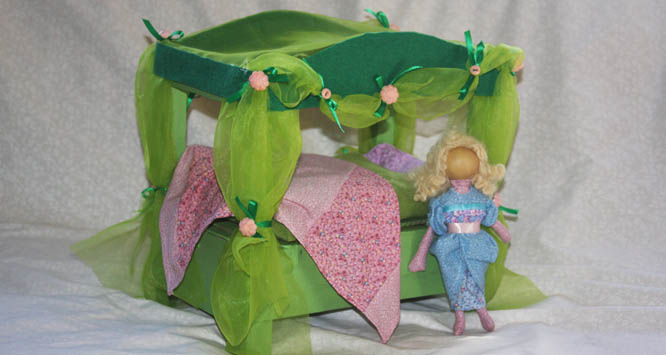

When we started this bed, we were planning a simple bed with glued legs. But while the legs were drying on the upside-down crate, we got the idea of turning it into a canopy bed.
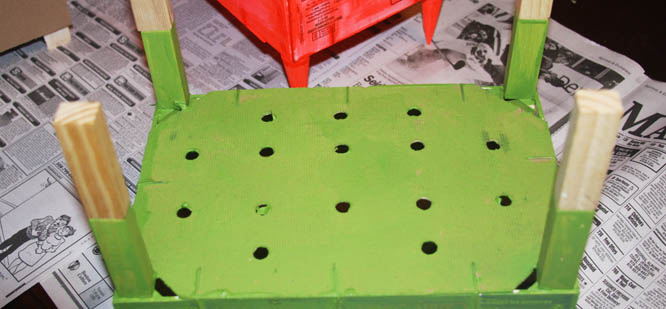

Glue two blocks, end to end, into the triangular holes in the bottom of the crate.

Make a template by the same method used for the headboard template above. Cut two canopy sides from cardboard. Also cut two straight pieces the same width as short ends of the crate.

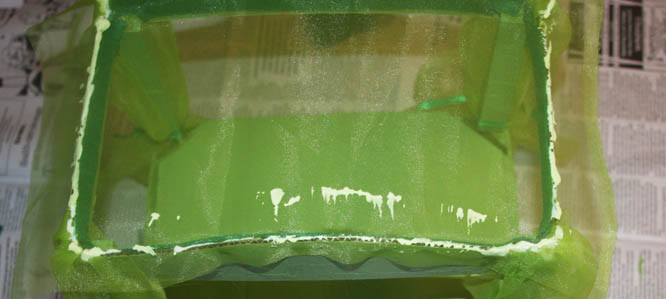
Glue the cardboard pieces to the top of the woodblocks to form the canopy. Put a glob of glue onto the end of each block.


Cut 4 strips of sheer fabric approximately 15" long and 7" to 8" wide (you may have to adjust the measurements to better fit your canopy's height). Press the end of a strip into the glue in the canopy's top corner and hold for a moment until the glue sets around the fabric. The length of the fabric should hang over the corner of the bed. Glue the other strips into their corners.
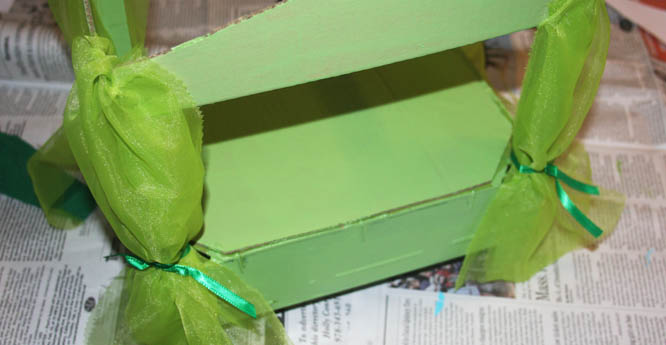

Tie the curtains down so that they cover the corners of the bed. If the curtains are too long, you can trim them later.
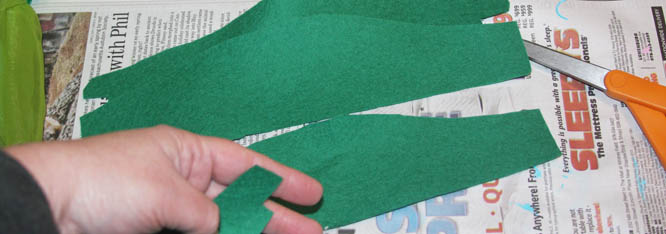

Use the same template for the cardboard canopy pieces to cut out four side pieces and four end pieces from felt. Divide the eight felt pieces into two sets that have two side pieces and two end pieces.
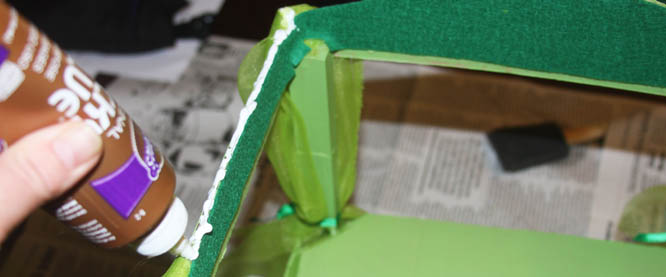

Take one set of the felt pieces and glue onto the inside of the canopy. Clip little notches into the felt pieces if that helps them fit over the corners better.
Squeeze glue along the top edge of the canopy

Cut an approximately 12" x 16" piece of fabric and position it over the top. Pull it gently so that the canopy doesn't sag. This can be a bit tricky, and a bit messy.


If glue smears where it shouldn't be, moisten two paper towels. Hold one below the canopy fabric and the other above. Press and dab the misplaced glue. Most glues dry clear, so don't worry if you can't get it all out.
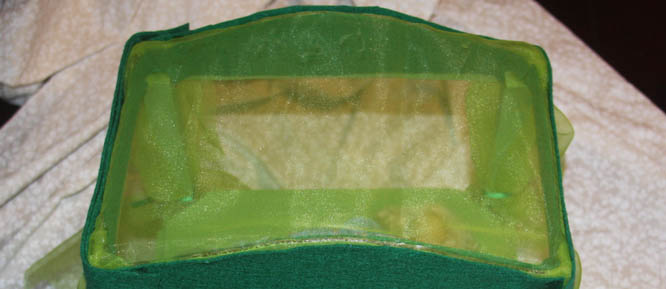

Glue the second set of felt pieces to the outside of the canopy. If you do this while the glue is still wet, you can gently pull the canopy fabric tighter. The outside felt pieces will hold it in place when dried.

For the valance, cut two strips of fabric that are approximately 7" wide and 36" long.
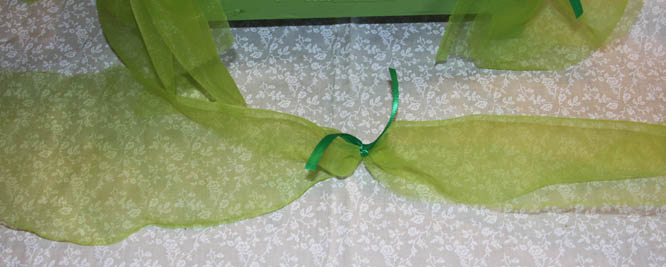
Take one strip and scrunch the fabric together at the center point. Tightly tie a ribbon bow around the middle. Scrunch the fabric again a few inches down and tie a bow. Continue until you have five ribbon bows on the valance, two on either side of the center ribbon.
Hold the valance up to the canopy. Adjust the two outside bows so that they will fit over the corners. Either tack the valance into position with a needle and thread, or use fast drying fabric glue.
Use the same method to make the valance for the other side of the canopy.
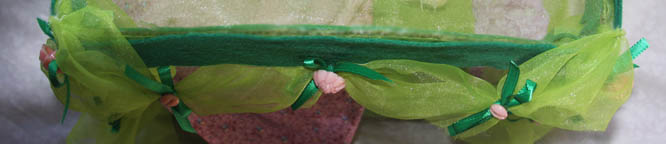

You can leave the ribbon bows plain or sew onto them. We got out our jar of vintage buttons and found some rose buttons that worked nicely. Another alternative would be to glue on or .
Easy to Sew Doll Mattress

This is an easy way to sew a mattress with gussets: it only requires two pieces of fabric instead of three. I learned this technique when I was sewing fabric shopping bags.
Cut out two pieces of fabric that each measure 9-1/2" x 13-1/2." Line up the printed sides so that they are facing each other. Sew a 3/4" seam all around the edges, leaving a 4" length of seam open on one side of the mattress (make sure that you sew each corner, or this trick won't work).
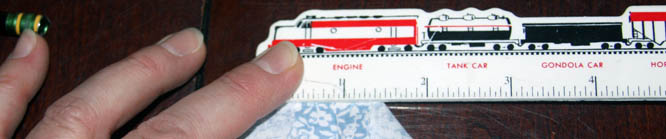

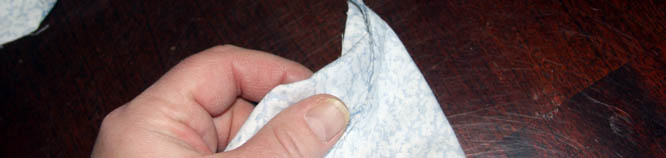
Take one corner and spread the seam allowances apart on the front and back of the corner. Pull the facing pieces of fabric away from each other and smooth flat on a firm surface. The seam should run straight down the middle of the corner, with each piece of fabric forming a 45 degree angle on either side of the seam.
With the ruler perpendicular to the seam, slide the ruler down until you've reached a point 1-1/4" across. That is how thick the mattress will be after it has been stuffed. Mark the line with pencil.


Sew across the pencil mark.
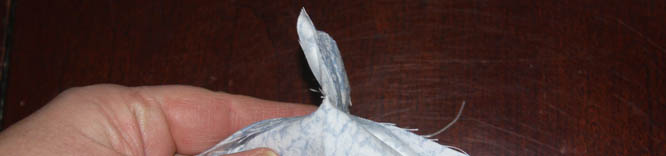

The photo above shows how the corner will look when viewed from the side. Mark and sew the other three corners.


Turn the mattress inside out and stuff it with several handfuls of polyester fiberfill. You don't want to stuff it too tightly or the mattress will bulge.
Pin the opening together and hand-sew shut.
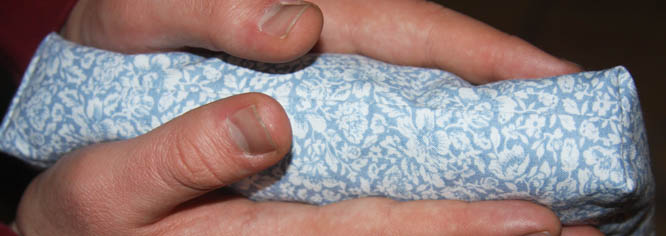

Smooth out and distribute the fiberfill evenly by rubbing the mattress firmly between two hands. Make sure that the filling plumps out the corners.
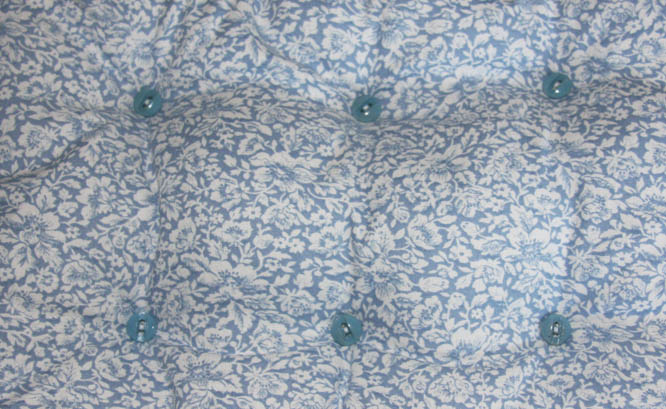

To help the mattress keep its shape, you will need to tack the fiberfill into place so that it doesn't slip around. Pinch the mattress near where you want to sew your first tack and stitch through all the layers. After repeating the stitch a few times, sew a button over the stitches.
Repeat until you have 6 or 8 buttons holding the filling in place.
Easy to Make Doll Blankets
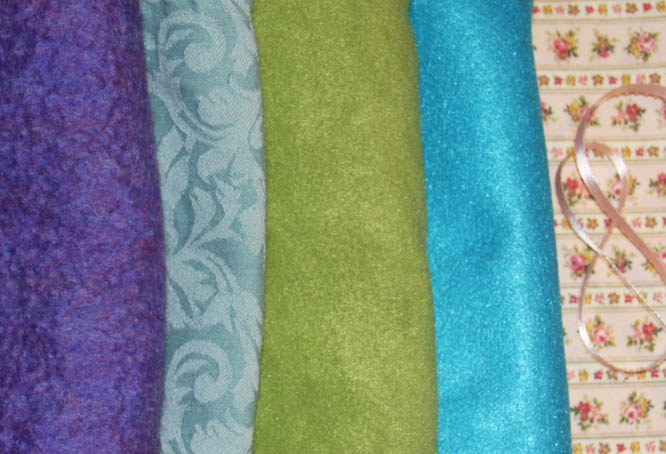

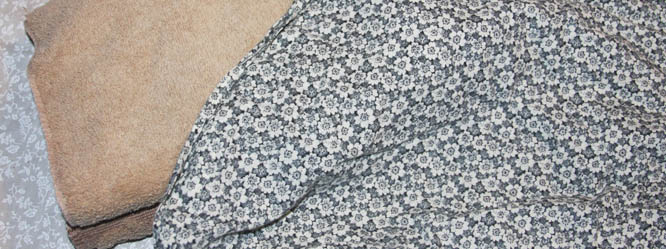
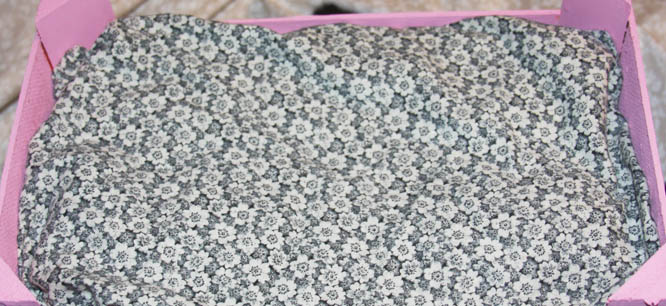
You can use scarves or napkins for a doll's blanket, or you can make one out of non-fraying fabric. The purple scarf and the jacquard napkin in the photo above didn't need to be hemmed before becoming a doll's blanket.
The green fabric in the photo is acrylic fleece which was easily cut to size and won't fray.
The blue fabric above is acrylic craft felt that I cut to a 14" x 14" blanket. You could also use a pre-cut 9" x 12" sheet of craft felt, but it would definitely be a smallish blanket for this size of bed.
To make a blanket out of flannel, seal the edges with a that prevents fraying and then glue ribbon on the edges as trim .